Overview
You can add as many classes to your backpack as desired. It is usually good to have a number of alternative classes backpacked.Step-by-Step Process
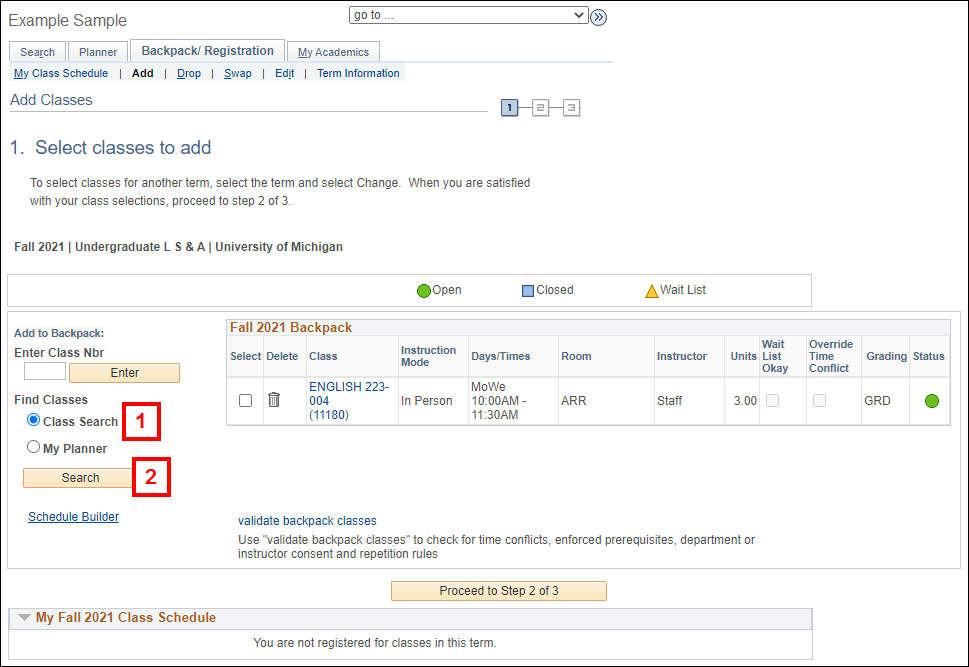
- Click the Class Search radio button.
- For Planner: You can search for a course you have added to your Planner by clicking the My Planner radio button, then Search. Click select next to the desired course, then go to step 6.
- For Schedule Builder: To explore various options for scheduling your courses, click Schedule Builder. If you have sent a schedule from Atlas Schedule Builder to your Backpack, a message displays on the page. Click the Import Schedule button to complete the process of adding the classes to your Backpack. Go to step 11.
- Click Search.
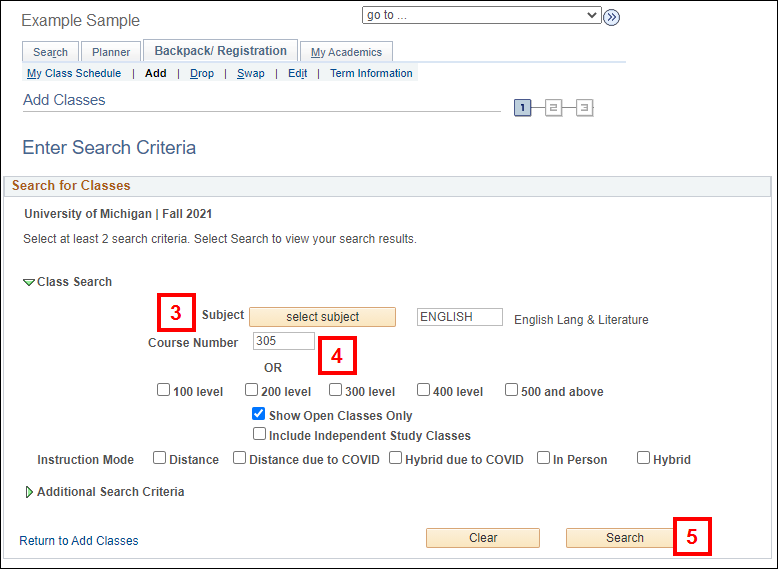
- In this example, ENGLISH 305 will be added to the backpack. This course is a two component course (lecture and discussion).
- Enter a Subject or click Select Subject to choose the subject from a list.
- Enter the Course Number if you are searching for a specific course, or click the box next to a course level(s) (e.g., 100 level, 200 level) to search for a range of courses.
- Click Search.
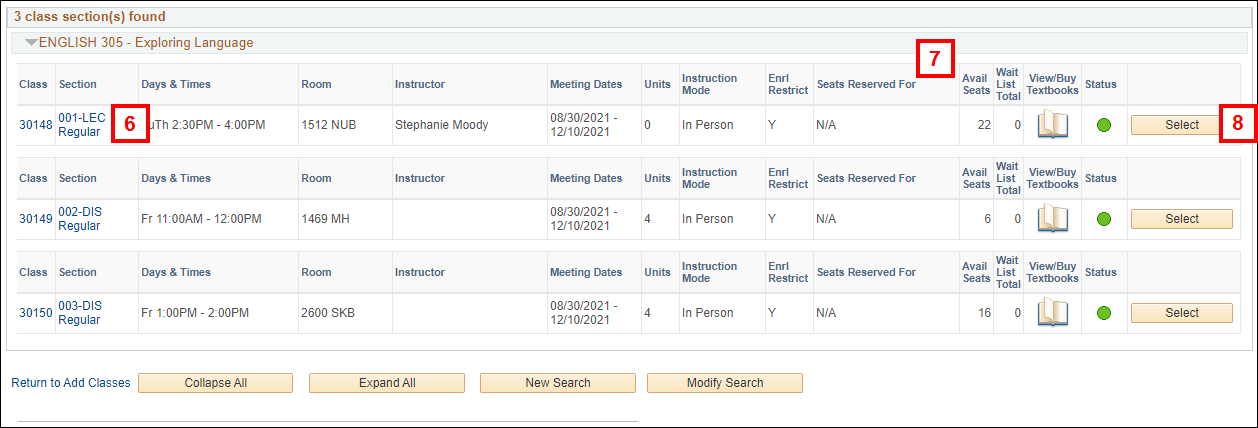
- Click the Section link to view class details.
- If you searched by course level, locate the course in the list. You may need to expand the section to view the list of classes.
- The Enrl Restrict column indicates if there is an enrollment restriction. The type of restriction (e.g., advisory requisites, course/class requisites, consent, reserved capacity, etc.) is shown on the class details page.
- For Planner: The example shows how classes are listed when you perform a class search. If you search from Planner, the list will look slightly different but contain the same information.
- View class details.
- In this example, ENGLISH 305 has two class components with an autoenrollment relationship. When you enroll in a discussion section, you are automatically enrolled in the lecture section. The required lecture displays on the Related Sections page (see step 11).
- Any enrollment restrictions display in the Enrollment Information section.
- Click Select.
- For Planner: If you are searching from Planner, you need to click Return to Add Classes and click Select next to the class.
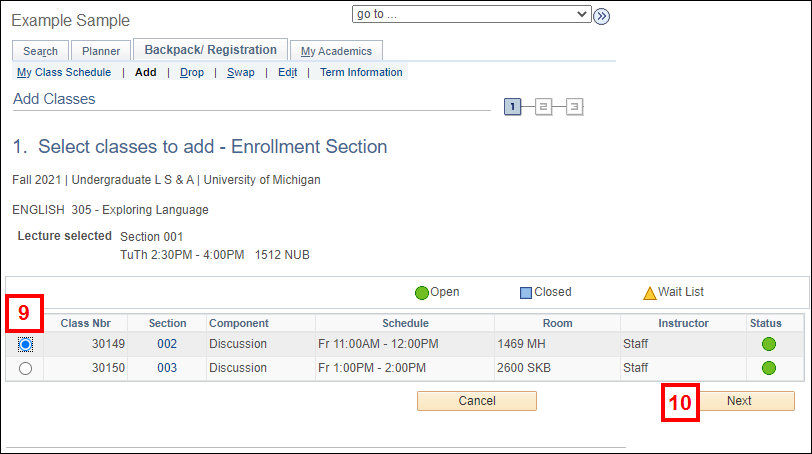
- Click the radio button next to the section you wish to backpack. In this example, the discussion component is being selected.
- Click Next.
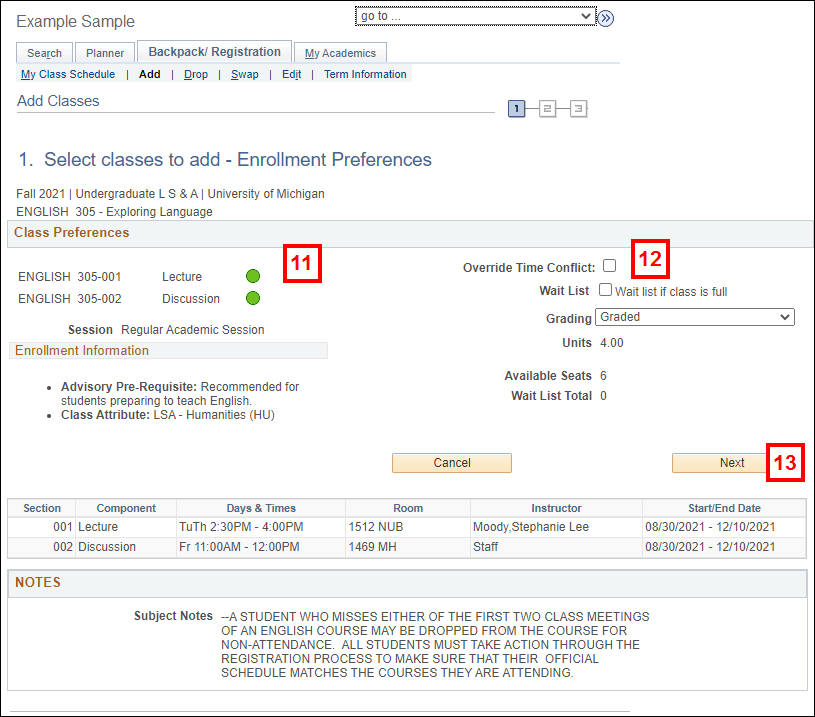
- Review class details on the Enrollment Preferences page.
- Update editable fields if desired. The editable options differ by class.
- Wait List – For classes that carry a wait list, allows you to be placed on the class wait list.
- Override Time Conflict – For registration purposes, allows you to register for a class even if you have another class already registered at that same time.
- Grading – Allows you to select the grading basis for certain classes.
- Units – For classes that offer a range of units, allows you to select the number of units you wish to take. The allowable values available will display in a drop-down list.
- Click Next to add the related section to your backpack.
- In this example, you are being automatically enrolled in the associated lecture component of the class. Not all multiple-component classes have the auto-enrollment feature. For those that do not, you are prompted to select a related section at this point.
- Verify the class has been added to the backpack.
- For Schedule Builder: You will see a verification message after adding the classes imported from Atlas Schedule Builder. However, the wording is different than the example shown.
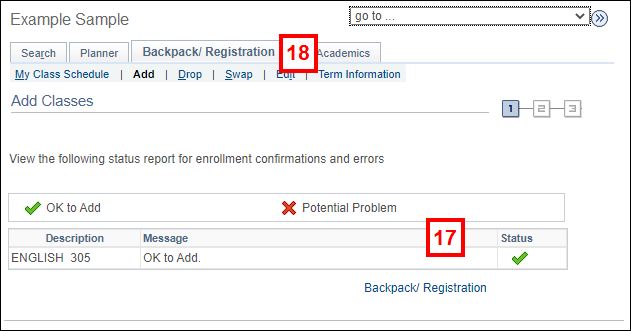
- Check the box(es) next to the courses you want to validate.
- Click validate backpack classes.
- Review the validation information.
- Information about potential problems displays in the Message column. If you do not understand an error message, see the Troubleshooting Registration Error Messages help page for more information.
- Click Backpack/Registration to return to your Backpack.
Select classes to add screenshot
Enter Search Criteria screenshot
Select classes to add - Enrollment Section screenshot
Select classes to add - Enrollment Preferences screenshot
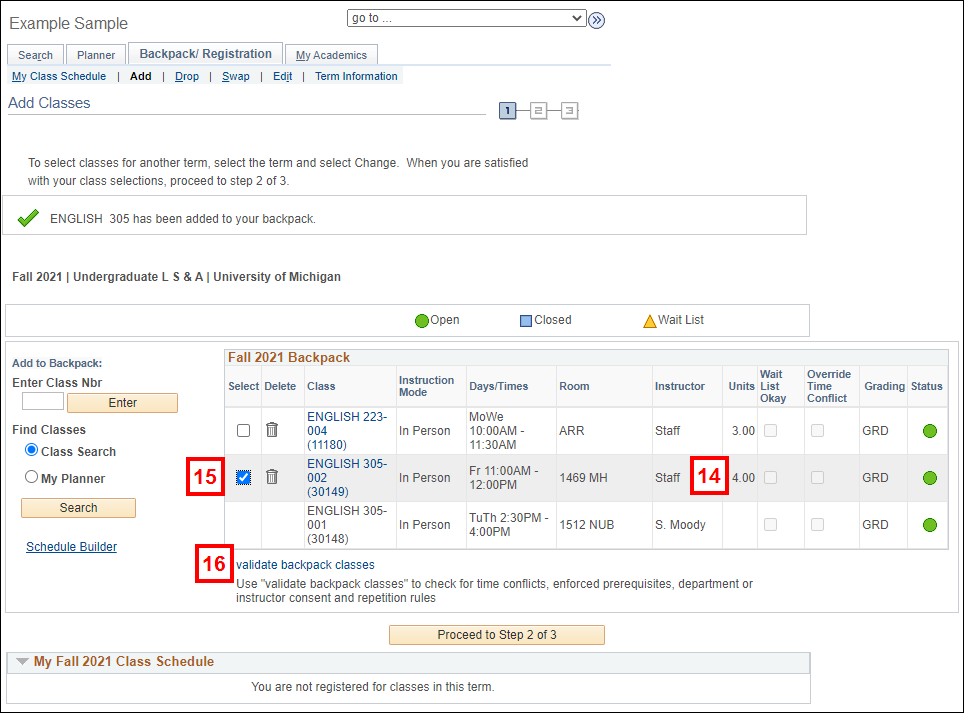
Validate Backpack:
Note: After adding classes to your backpack, you can check for some potential enrollment issues by using Backpack Validation.